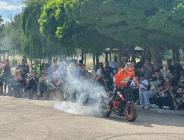
17:06 - Amasya’da Dev Motosiklet Festivali
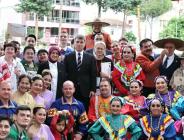
16:56 - Kıtalararası Kültür Buluşması Amasya’da Gerçekleşti
16:51 - Minik Basketbolcular Babalarıyla Sahada Buluştu
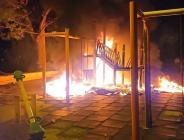
16:44 - Çocuk Parkını Kundakladılar, Suç Kayıtları Dudak Uçuklattı!
16:35 - Gençlerden Sanat Dolu Yıl Sonu Sergisi
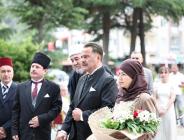
16:29 - Atatürk Onur Yemeğiyle Tarihe Yolculuk
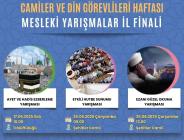
16:23 - Amasya’da Din Görevlileri Arası Yarışmaların İl Finalleri Başlıyor
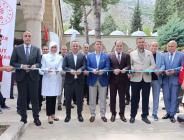
16:18 - Amasya’da Sağlıkta Bir İlk: Türkiye’nin 4. Larva Tedavi Merkezi Açıldı
16:13 - Yaz Geldi, Kene Riski Arttı,Kene Vakalarında Artış
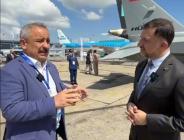
16:08 - TUSAŞ’tan Paris’te Güç Gösterisi: KAAN Seri Üretime Geçiyor
Cara render video di adobe premiere pro cc 2018 free download

We’ve visualized the solution for you in hopes that it’ll make opening a Premiere project in a previous version a little bit easier on you. In Premiere Pro, go to File > Export > Media. · Choose the format and preset. · Instead of clicking Export, click Queue. The file now launches.
What you’ll need. Get files. Export a video file. Output your video so you can share it with others. What you learned: Export a sequence To export a sequence as an H. In the Export Settings dialog box, choose Format: H. Motion Graphics templates from After Effects that have been used and customized in a Premiere Pro sequence can be replaced with an updated version of the template.
You can choose to have the template updated everywhere it was used in the project or limit the change to one instance. Where possible, your customizations are preserved. Legal Notices Online Privacy Policy. Buy now. User Guide Cancel. Learn how to install and use Motion Graphics templates in your Premiere Pro projects.
Install Motion Graphics templates. Motion Graphics templates directories. Organize Motion Graphics templates. Create a library. To create a library, do the following:. A new Library has been created. Add graphic to library. Right-click the graphic from the Essential Graphics Panel. The graphic has been moved to the Library. Browse and manage Motion Graphics templates. Browse and manage Motion Graphics templates in the Essential Graphics panel 2 mins.
In My Templates view, you can do the following: Enter a keyword in the search bar to quickly find exactly what you are looking for. Use the checkboxes as filters to view templates available locally, or across your Libraries. Use hover scrub to preview animations for templates that include video thumbnails. Favorite a Motion Graphics template by clicking its star icon.
Then use the Favorites filter near the search bar to quickly view all your favorites at once. Use the Info View to rename and add tags to your Motion Graphics templates for quick organization and searching. Newsletter Get occasional emails about tips, new products, updates or offers. Item added to your cart. In your cart. Continue Shopping Checkout. How to buy? Buy at Videohive. Accept All Cookies Cookies Settings. Cookies Settings. Because of this, the format will be supported by most NLEs for years to come.
Since it is still so common, having more codec options when exporting. MOV files in Premiere can save you a lot of hassle. In Media Encoder, once you have a sequence queued for export, click on the button in the Format column to open your export settings. From this point onwards, the process is exactly the same for both applications. Click on Open AfterCodecs Settings. In the Video Codec drop-down, select one of the H. The AfterCodecs menu also offers a wide range of export settings for this codec.
Speed affects compression optimization, meaning lower render speeds will result in smaller files, and faster speeds will result in larger files.
However, if you choose Bitrate or FileSize , the algorithm will also compromise file quality to get your render out faster. As a general rule, with slower render speeds, you will get smaller files of higher quality.
Adobe Illustrator CC is a powerful tool that can be used for vector art and illustration. Adobe Illustrator CC v


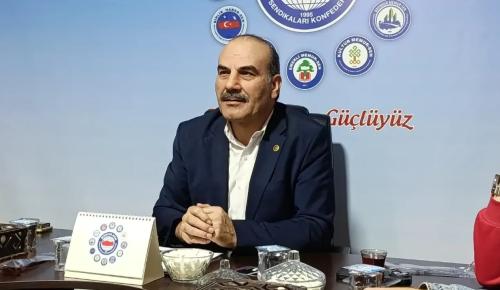
 “Eğitimde Liyakat, Sadakatle Yer Değiştiriyor”
 Amasya’da Dev Motosiklet Festivali
 Kıtalararası Kültür Buluşması Amasya’da Gerçekleşti
 Minik Basketbolcular Babalarıyla Sahada Buluştu
 Çocuk Parkını Kundakladılar, Suç Kayıtları Dudak Uçuklattı!
 Gençlerden Sanat Dolu Yıl Sonu Sergisi
 Atatürk Onur Yemeğiyle Tarihe Yolculuk
 Amasya’da Din Görevlileri Arası Yarışmaların İl Finalleri Başlıyor
 Amasya’da Sağlıkta Bir İlk: Türkiye’nin 4. Larva Tedavi Merkezi Açıldı
 Yaz Geldi, Kene Riski Arttı,Kene Vakalarında Artış
 TUSAŞ’tan Paris’te Güç Gösterisi: KAAN Seri Üretime Geçiyor